Week 7
- Odhran Mclaughlin
- Apr 5, 2023
- 3 min read
Updated: Apr 6, 2023
During week 7 we were challenged to follow videos to complete tasks. These tasks were designed to teach us the basics of UV maps.
Challenge One
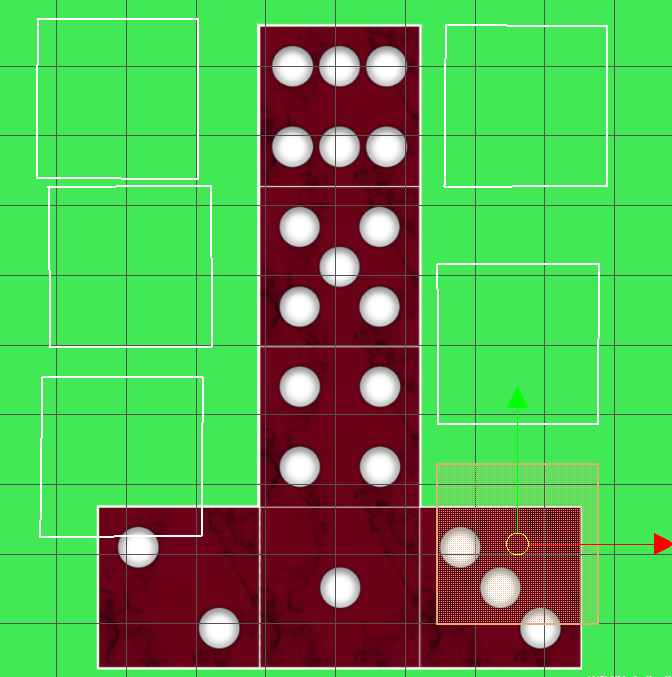
Challenge one was designed to teach the basics of how uv mapping works, we were given three cubes, one with a dice texture and the others without any texture.
We then opened the uv tab at the top of the screen with the left most cube selected, it opens a window which looks like this, then the borders of the shape are moved so they match the outline of the image which results in the image being placed correctly on the cube

Next we needed to fix the furthest right cube, when the uv window was opened however the uv cubes were detached from each other, to fix this we needed to use the cut/sow tool which works by attaching the edges of two uv shapes to each other, using the sow tool we combined the edges of shapes back into the shape of the texture whilst using the cut tool to correct mistakes, finally we repositioned the uv vertexes to fit the texture properly

The result was three identical cubes with dice textures

Challenge 2
For challenge 2 we were taught how to fix texture stretching on models. To do this we were given two cylinders, one of which was stretched.
Image supposed to be here but hit limit
To fix this problem we first opened the uv editor and turned on the textures using the checker map button
Then we hit the modify tab with the top and bottom edges of the rectangle selected, then the unfold option is selected, this causes the rectangle to be stretched so the texture is the correct size, it is then rotated so that the texture is facing the right way. Next the rectangle and circular faces are selected together and the layout option is selected. Once we have ensured that preserve 3D ratios are on we apply the effect which ensures all uv maps are to the same scale.
This process is repeated for the second cylinder however the top and bottom faces are also unfolded to allow them to have the correct shape (Instead of just a circle)
Challenge 3
Challenge 3 taught us how to texture an object with more complex geometry, to do this a planar is used across the x axis.
Next the top and bottom rims of the barrel are cut in the uv editor. Then an edge at any point of the main body of the barrel is cut and it is unfolded similarly to the previous objects. It is then rotated back to a suitable position. (Note: UV points can be selected in the model editor as well)
Next the top and bottom faces changed into circles using the planar tool along the Y axis and then repositioned to suitable points. This process is repeated for the cap on the top face.
Then layout is selected to ensure all uv maps are to the same scale. Next the UV points along the edges of the main body from corner to corner are selected and scaled down causing the outside edge between them to become straight. This is repeated for all edges and the edges are moved to ensure the points all remain inside it. Next all UV points except the corners are selected and the modify tab is opened and the UV points are unfolded using both unfold-U and unfold-V options, this causes the edges inside the shape to straighten providing a typical UV face we are used to working with.


Comments