Week 4
- Odhran Mclaughlin
- Mar 23, 2023
- 3 min read
Updated: May 16, 2023
During Week 4 we were taught how to use curves to quickly create a variety of objects of similar shapes.
We also went through our list of assets on codecks as a group in order to see if they were still relevant to the scene as well as to see if we could add any more. Afterward we decided our time would be best spent working on our selected assets from the list
Pots
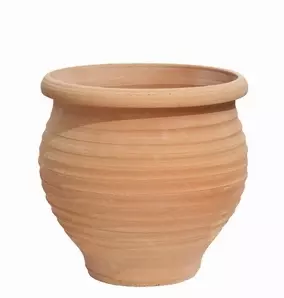
First I decided to find real world references of Clay Pots in order to get something to base my designs off of.
I then looked into Roki in order to try to find examples of pots in their style. In the end I couldn't find any references to work from so I decided to use references from cartoonish games (E.g. The Legend of Zelda Wind Waker).

Planning
I decided to use these images to create a series of pots and bottles and so first designed sketches. In order to ensure I hadn't simply copied the pots from Zelda I decided to design a series of various pot shapes based on both the real world references and my real world knowledge. As these models didn't have any references to Roki I tried to keep the shapes simple and rounded (No harsh/sharp edges).

Technique
This is done by first creating a curve and adjusting it until it is in a suitable shape, next it's pivot point of the curve is moved to the centre of where the object will be (assuming the curve will be the edge of the object). Next, while the curve is selected, revolve is selected in the surfaces menu and the correct settings such as degree of rotation, number of segments, face shape and revolution axis. Then, once revolve is pressed an object will be spawned in the shape of the curve.

This object can be duplicated and moved away causing it to remain in shape whilst you change the curve which will change the shape of the original. Repeating this allows you to create a number of similar yet different items in a short space of time . (As shown by the pots I have made bellow)

Next, in order for these to be useable we need to convert the objects from nurbs to mesh, this is done in the modify menu by selecting convert to mesh, settings such as face count are selected in this menu. This allows the objects to have effects applied to them such as multi-cut and bevel which in turn can be used to show effects such as cracking as shown below.

Finally I added the model to codecks
Sword
I also decided to work on my sword model and reworked it from scratch using more techniques learned.

Technique
I used bevels and multi-cuts with more efficiency as a result of increased practice. I also used a plane alongside a curve to create a cloth. This is done by firstly ensuring the curve is selected next it is positioned and set to be a live object using the tool which looks like a magnet along the top menu. Next the plane is positioned and selected and the tool which snaps objects to curves is applied, this looks like a magnet touching a curve and is also at the top of the screen. Finally the plane is extruded along the curve and the attribute editor is used to cause twists and tapers in the cloth.


Comments