Week 11 - Rigging
- meekin-s
- May 6, 2023
- 2 min read
When it came to rigging I selected my character model and copied it into a new scene in Maya. I then made the location 0 on all the axis so it would be in the middle. I then centered the pivot of the mesh. I then combined all of my meshes together. I then feezed the transformation and then deleted my history. This helps rigging as things can go very wrong.

To rig the model we used Quick Rig. This is an easier method to rig the character very quickly. In order to rig the character I went to the rigging tab. I then went to Quick Rig. I then added my character and then selected my character combined model and hit the add sign.


I then clicked Create and Update. This created little circles that represent the joints in the model. I placed them all in the appropriate places. When you clicked on the circle you can see what joint it is. This was very useful to help guide me. Going into the front view and any side view was very useful to get the best accuracy. I also used wireframe mode to help me Aline the circles on the topology.


Once I got them lined up I then clicked update and create. This applied to all the bones. I wasn't able to move my character yet as the bones weren't connected to the mesh. I had to click the last option Skinning and create the Skelton. This combined the skeleton and the mesh together.

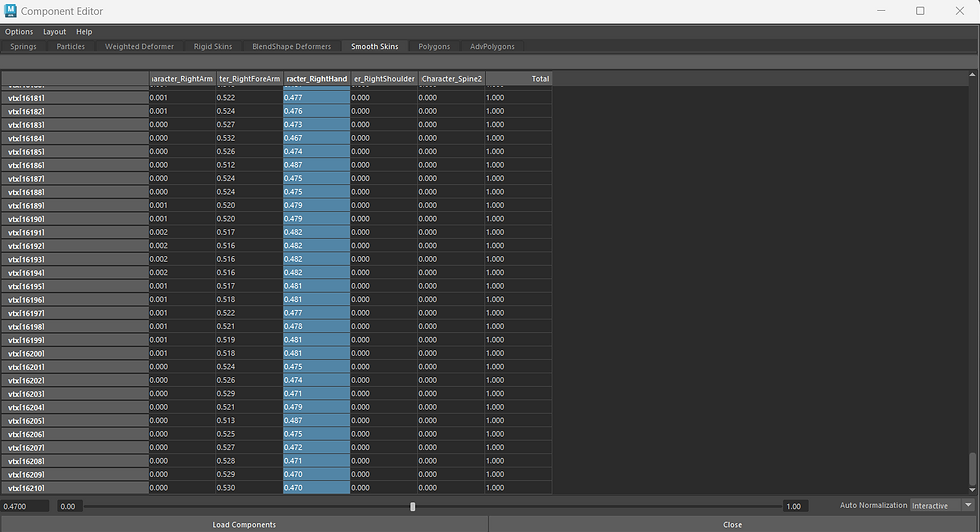
Once I got my character rigged I was able to select all of the vertices of the hand. I then went to Windows and general editors and component editors. I then went to the smooth skin tab. I was able to find the column for the Right arm and I selected all the vertices and changed them to the number 1. This means that all the selected vertices will move when you move the character.


I was able to do this method with certain body parts like the head, but unfortunately, when it came to the arms it completely broke the rig. The arms would not move at all. I had to undo all the selected vertices and move the joints. I then posed the character and it turned out well, but the elbow is a bit stretched when you look in wireframe mode. When in textured mode it looks completely fine. I just had to leave it as I was running out of time.


Comments